I have setup SAML 2.0 authentication with Azure AD for a couple of applications. I find that the documentation available is not sufficient. Today, I will attempt to create a step by step guide to integrate SAML 2.0 authentication with Azure AD.
Step 1: Obtain the Tenant ID
After logging into the Azure portal, you can open the Azure Active Directory by looking for it in the search box as below.

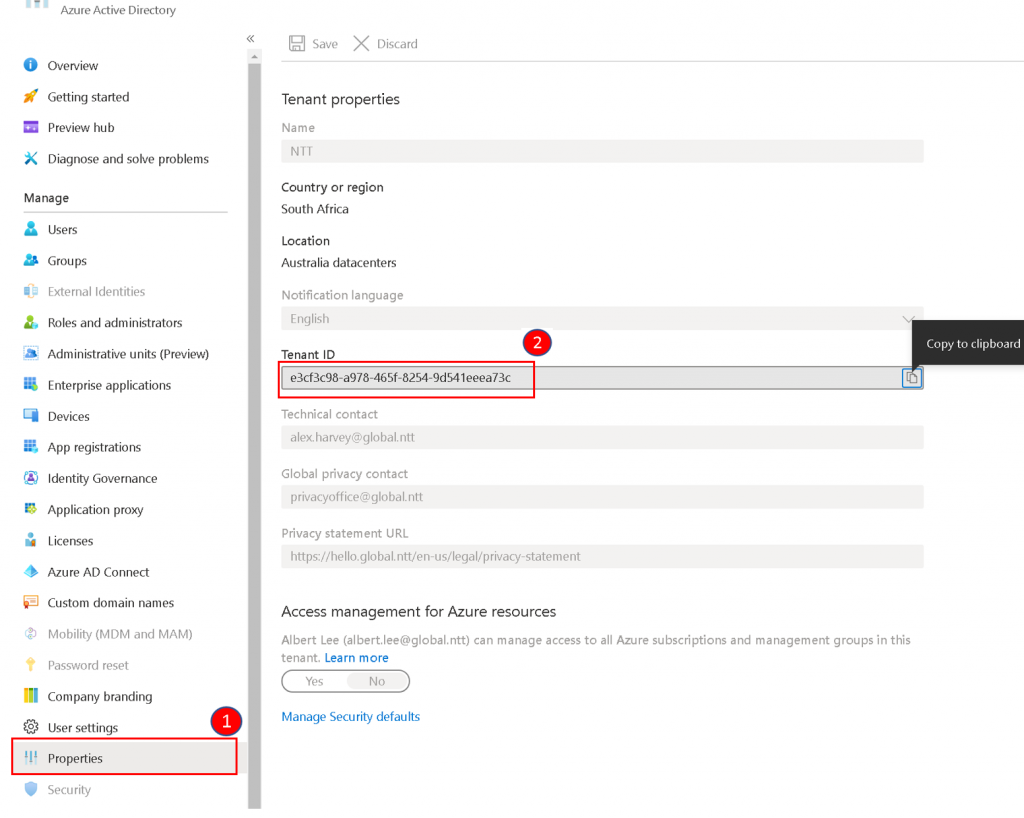
After opening the Azure Active Directory, click Properties and note the value for Tenant ID.
Step 2: Register an Application
In the search box, look for App Registration

After going in to App Registrations, click on New Registration

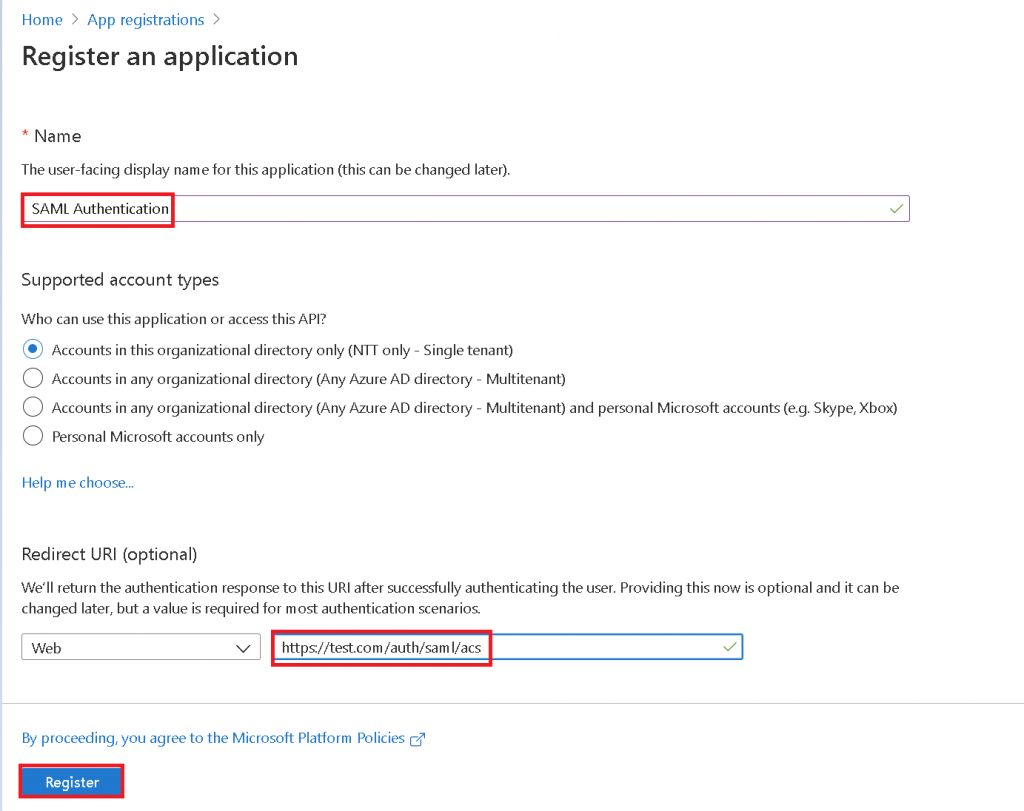
In the New Registration, enter the Name of the application (eg. SAML Authentication) and the Redirect URI (eg. https://test.com/auth/saml/acs). Click on Register to continue.
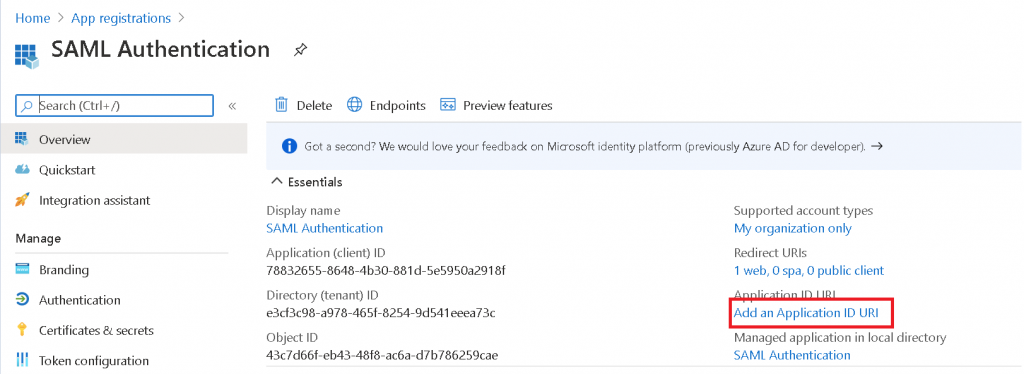
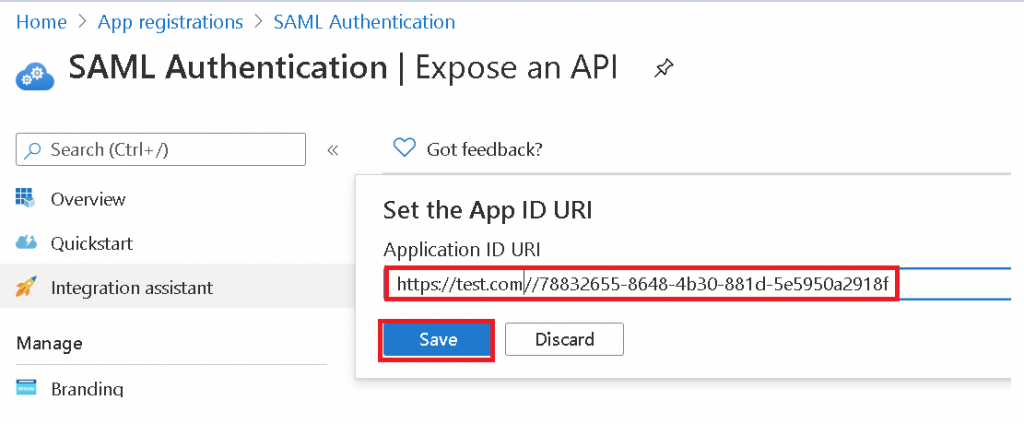
Once the App Registration is created, click on Add an Application ID URI
Click Set to set the Application ID URI
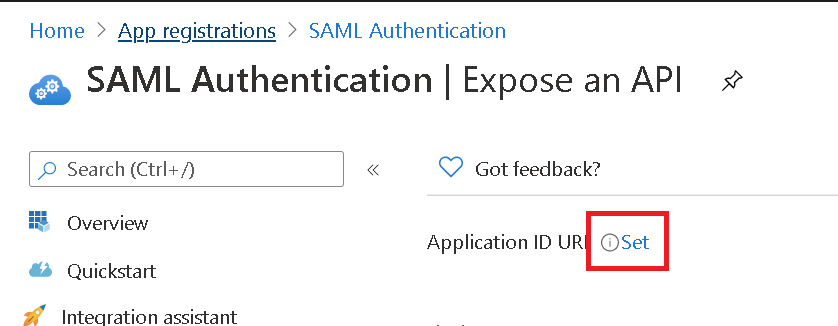
You can set a URI (eg. https://test.com/78832655-8648-4b30-881d-5e5950a2918f). This will be the EntityID. Click Save to continue.
After this, the configuration on Azure is completed.
Step 3: Get the IDP Certificate
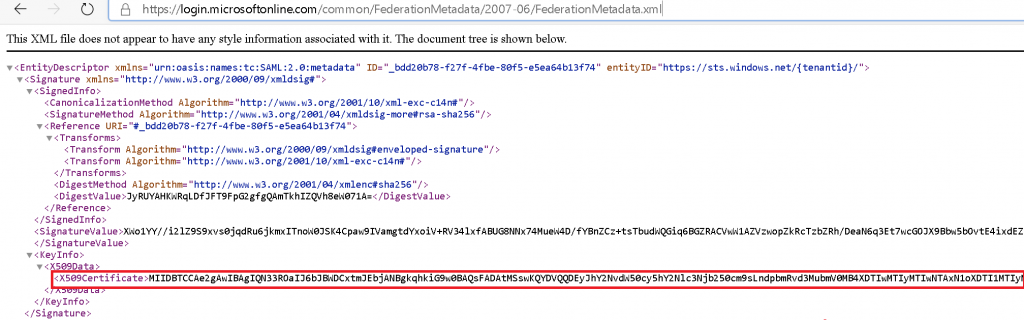
Go to https://login.microsoftonline.com/common/FederationMetadata/2007-06/FederationMetadata.xml and copy the contents of the X509Certificate as highlighted below
Step 4: Configure the SAML settings on the client app
Configure the settings as below:
| IDP Settings | |
| EntityID | https://sts.windows.net/<TENANT ID> |
| SingleSignOnService URL | https://login.microsoftonline.com/<TENANT ID>/saml2 |
| SingleSignOnService Binding | urn:oasis:names:tc:SAML:2.0:bindings:HTTP-Redirect |
| x509cert | The certificate obtained from Step 3 |
| SP Settings | |
| Entity ID | Application ID as above (https://test.com/78832655-8648-4b30-881d-5e5950a2918f) |
| assertionConsumerService URL | Redirect URI as above (https://test.com/auth/saml/acs) |
| assertionConsumerService Binding | urn:oasis:names:tc:SAML:2.0:bindings:HTTP-POST |
I hope this helps.