django_auth_adfs is a good module to integrate Django with Azure AD authentication in the cloud. Although there is a detailed documentation on the setup, the user interface presented were using the legacy user interface. I am attempting to replicate it using the new interface.
- Web server URL: https://test.com
- API exposed in web application: https://test/com/test/testpage
- IdentifierURL : https://test.com/test
- Redirect URL: https://test.com/oauth2/callback
Step 1: Register a web application
After logging into the Azure portal, you can open the Azure Active Directory by looking for it in the search box as below.

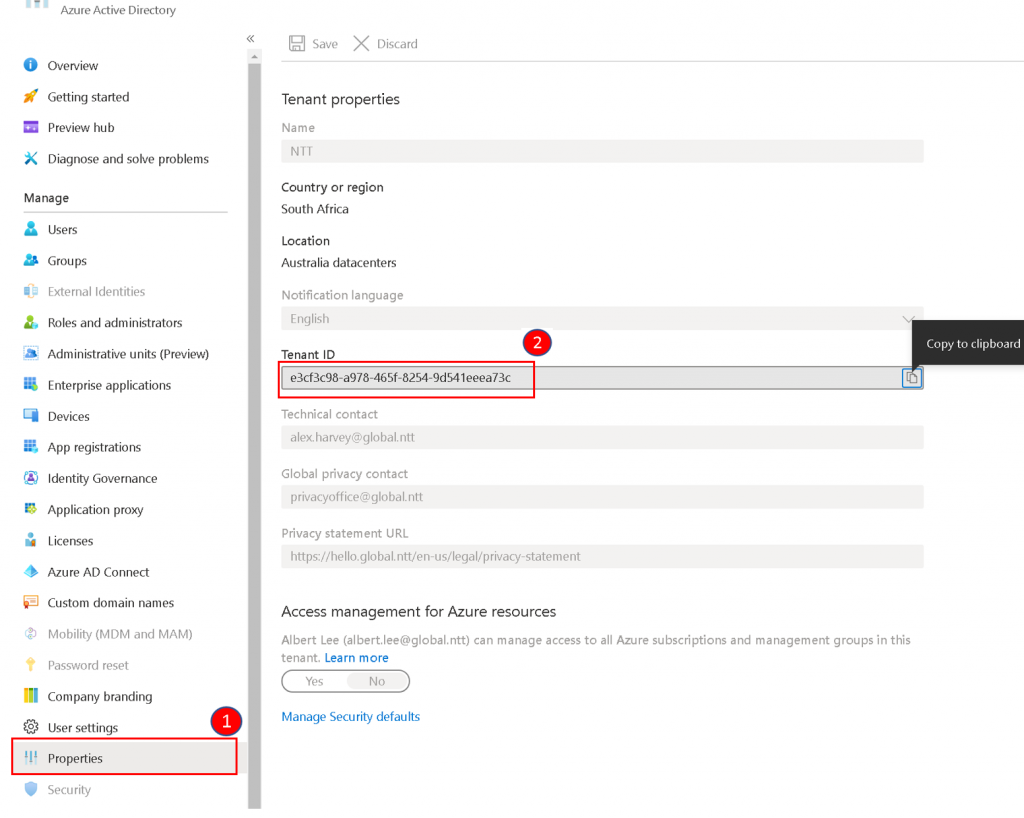
After opening the Azure Active Directory, click Properties and note the value for Tenant ID. This will be the value for TENANT_ID in the configuration file.
Find App registrations and click on New registration

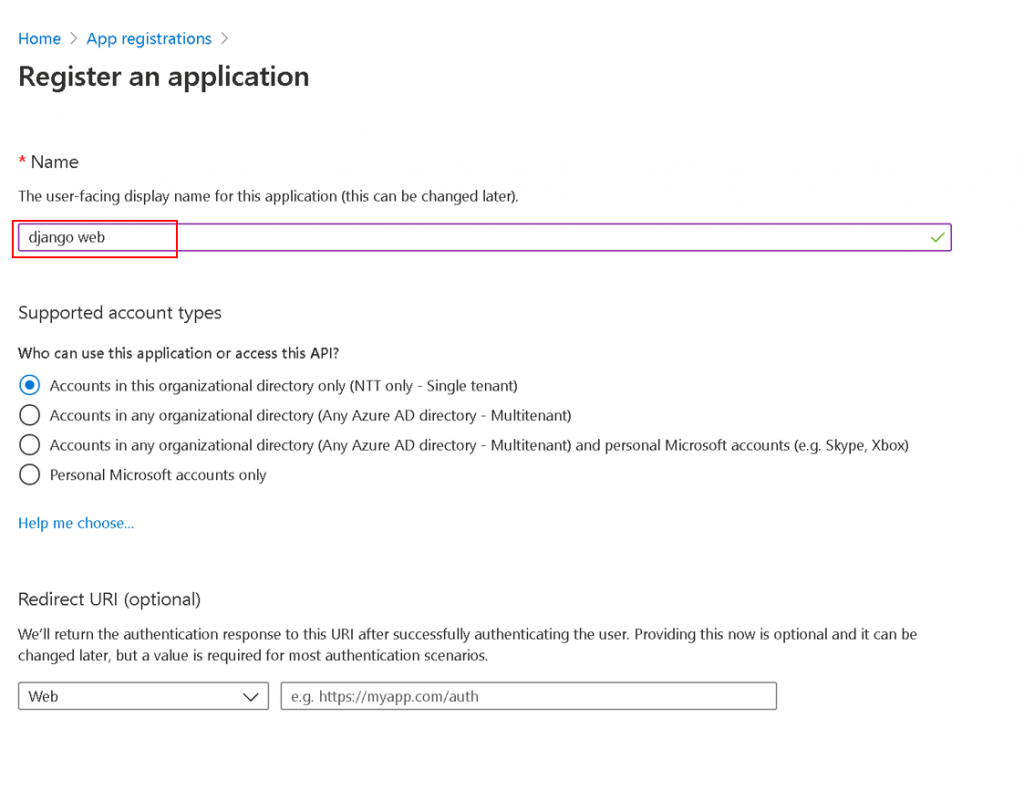
Enter the name for the web application, and click Register.
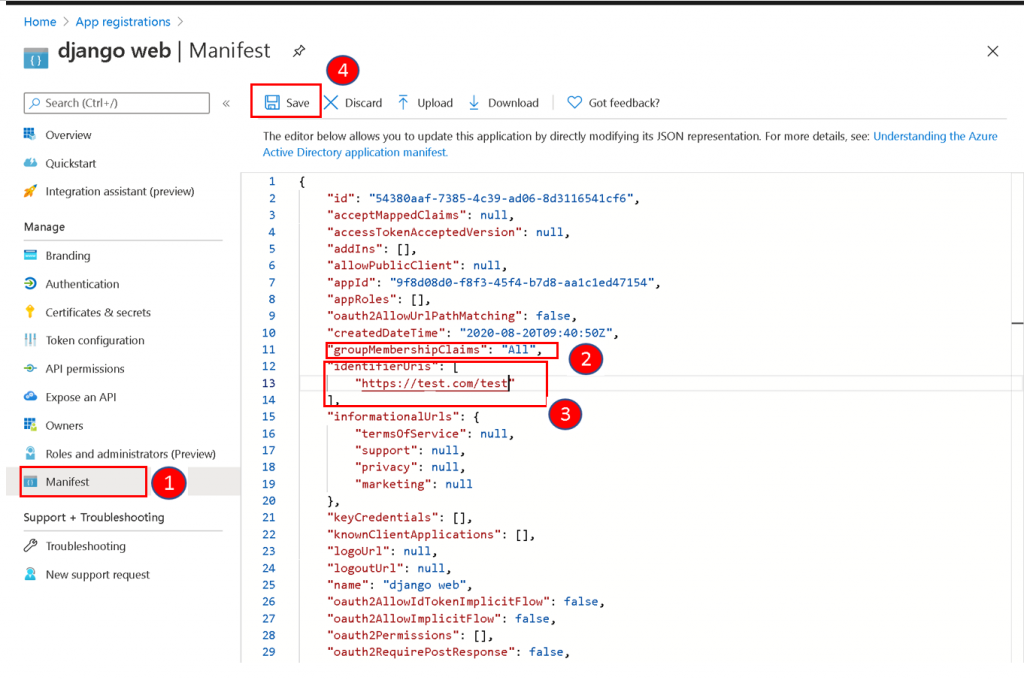
Click the Manifest button.
- Change the value of groupMembershipClaims to “All” to add the claim with groups to the access token. In large directories where there are many groups, the value should be “SecurityGroup”. Refer to documentation for the definition.
- The value of IdentifierUris will be used for RELYING_PARTY_ID and AUDIENCE setting. The identifierUris should be an unique identifier which is not the same as the root URL.
Click Save button to save the settings.
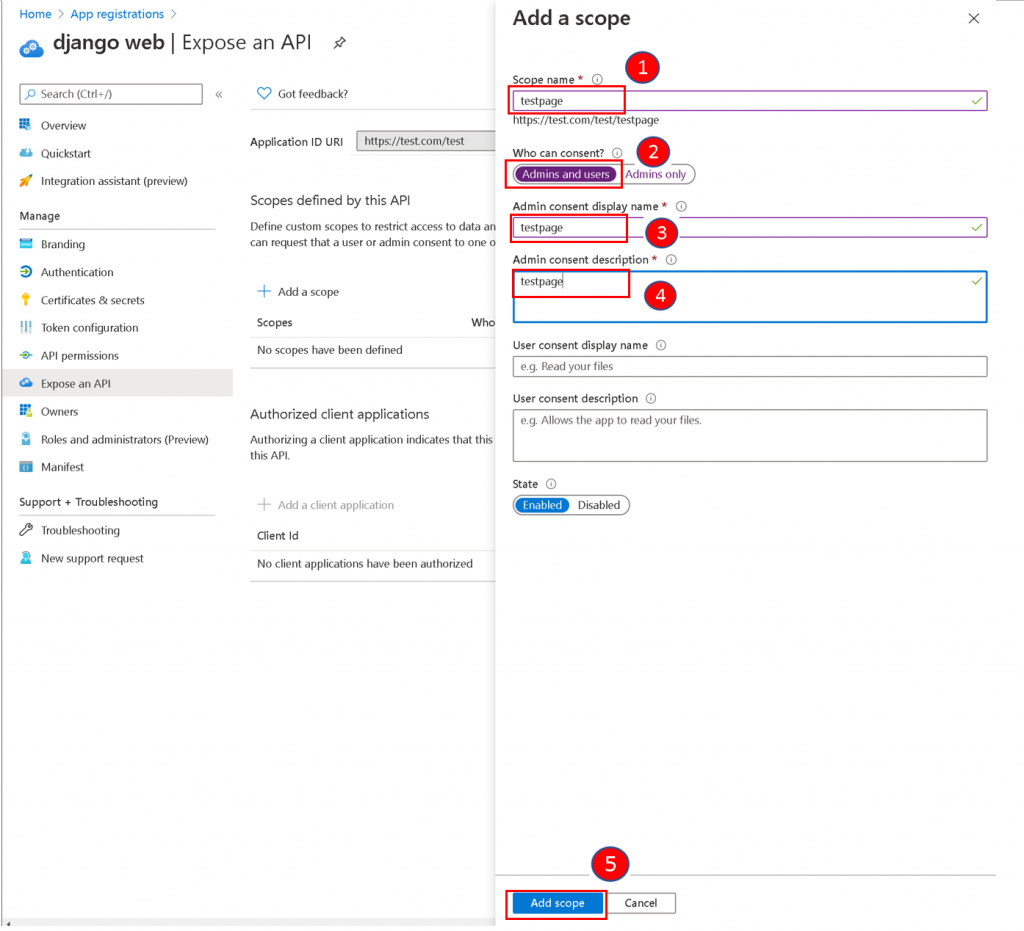
Click Expose an API and Add a scope to create an API for this app registration.
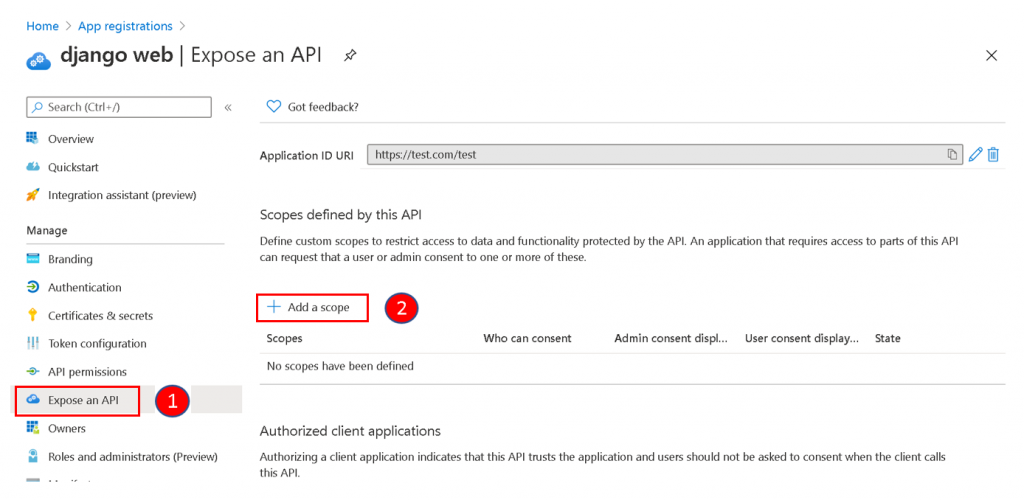
Add a name to the scope, select Admins and users for who can consent. Enter a display name and content description for Admin consent. Click Add Scope to complete.
Step 2: Register a Native Application
Find App registrations and click on New registration
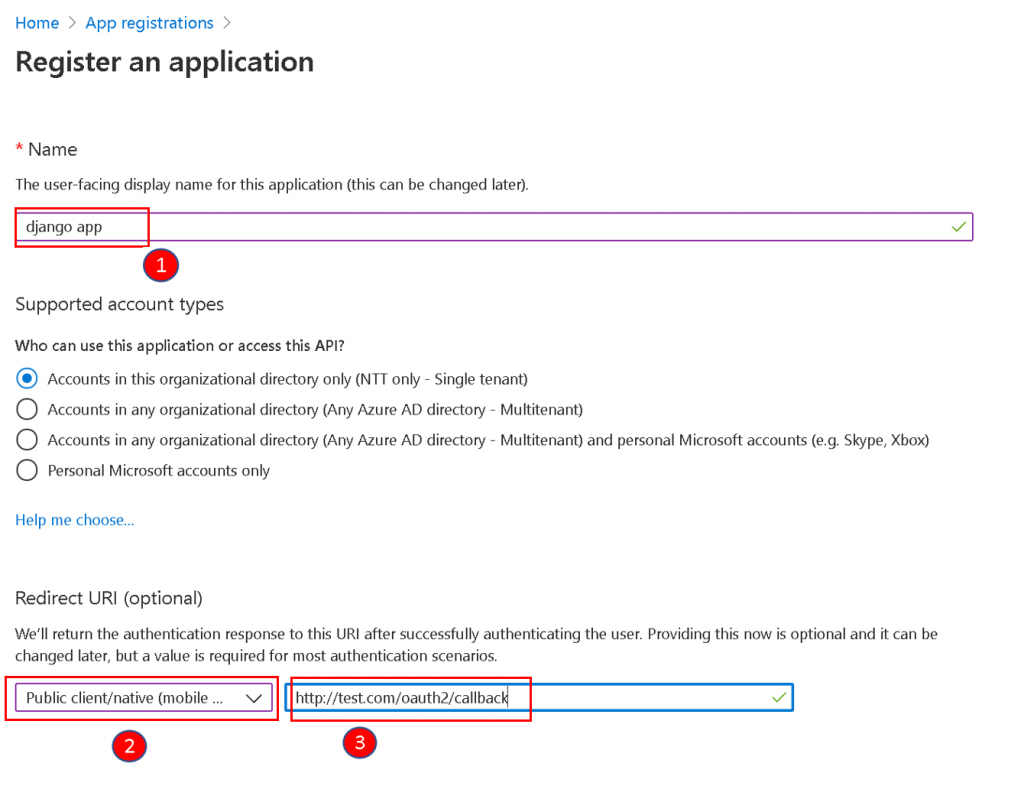
Enter the name for the native application, and select Public client/native.
The redirect URL value must match with the domain where the Django application is located and the patch where you mapped the django_auth_adfs urls in the urls.py file. If you follow the installation steps from the documentation, it should be something like https://test.com/oauth2/callback.
click Register.
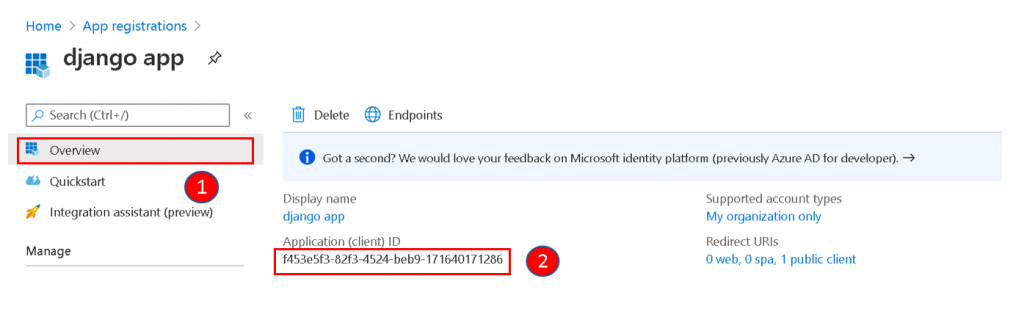
Click Overview to get the Application ID. The value is for the CLIENT_ID setting.
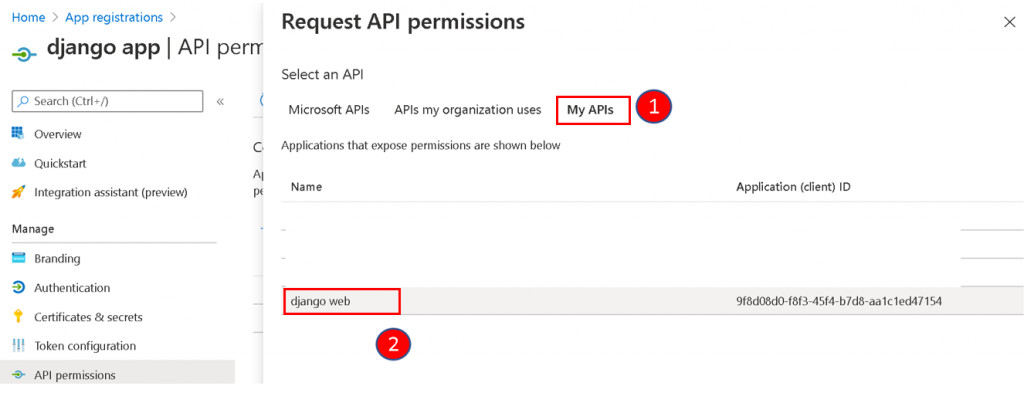
The native application needs to be given permission to access the web application we created earlier. Click API permissions and then select Add a permission.
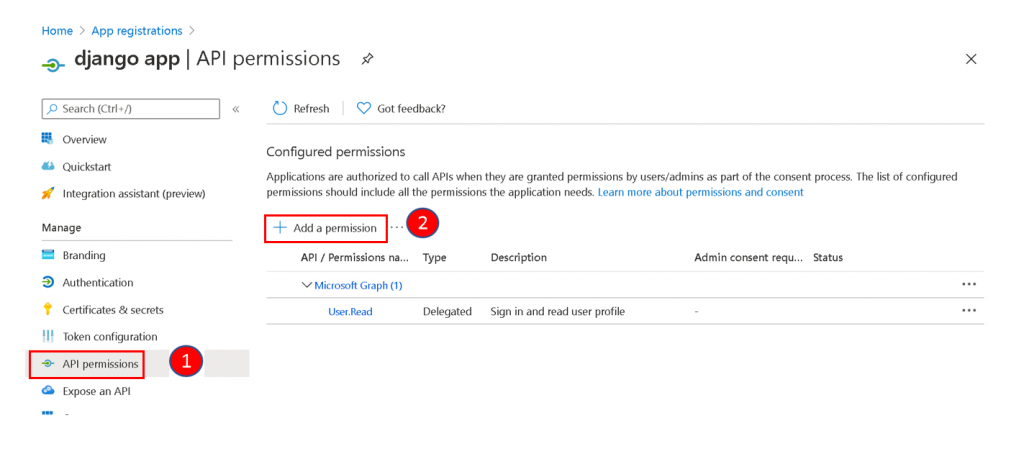
Click on My APIs and you will be able to see the web registration that you have done earlier. Select the web registration.
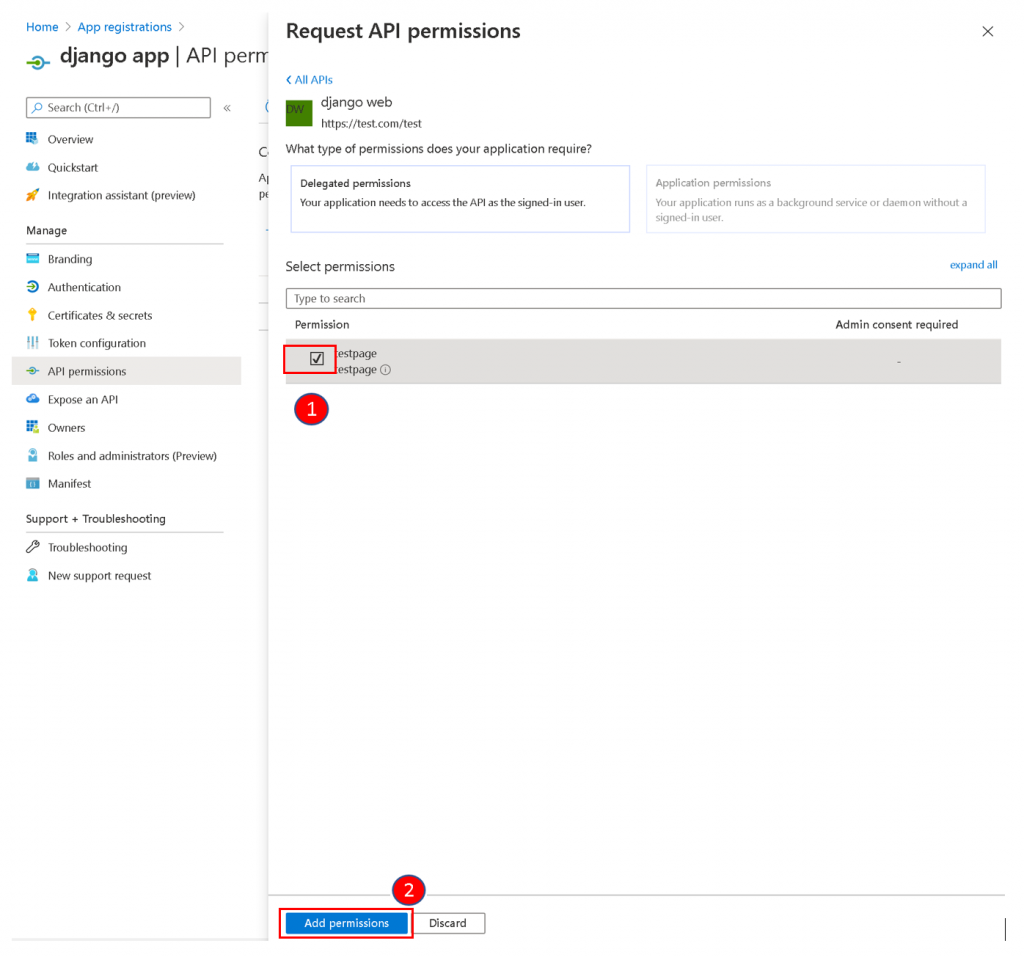
Tick the Permission and click Add Permission.
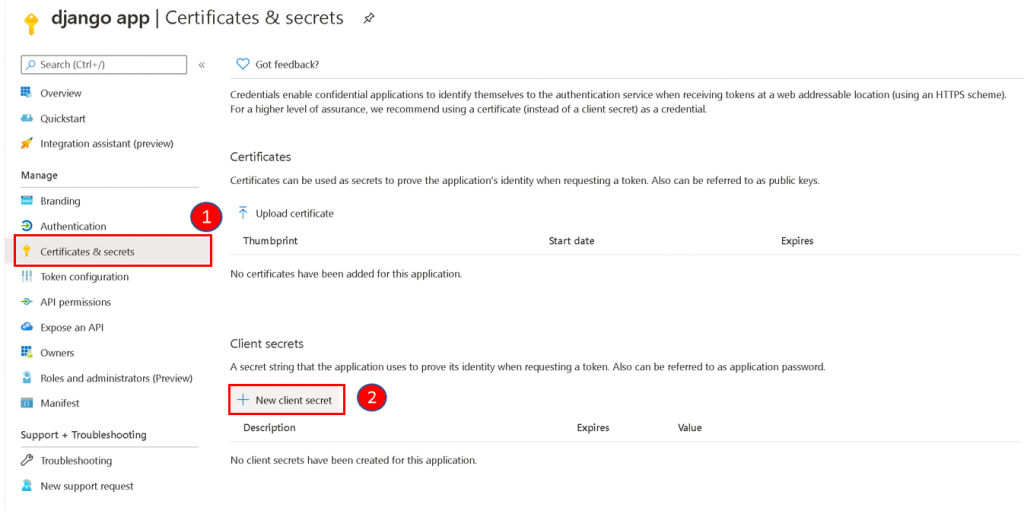
The configuration will need a CLIENT_SECRET, and it can be generated by clicking on Certificates & secrets, and clicking on New client secret. Follow the steps later to generate a secret and save the value.
Step 3: Request permissions from Directory Admin
The API created above needs to request permissions from Directory Admin, the documentation is attached here.
The example is as below:
// Line breaks are for legibility only.
GET https://login.microsoftonline.com/
e3cf3c98-a978-465f-8254-9d541eeea73c/v2.0/adminconsent?
client_id=f453e5f3-82f3-4524-beb9-171640171286
&state=12345
&redirect_uri=https://test.com/oauth2/callback
&scope=
https://test.com/test/testpage
Step 4: Continue to follow the step 2 of the documentation
The above steps were meant to be a replacement of the Step 1 of the documentation using the new Azure interface. You may continue step 2 of the documentation here.
I hope you like this.